Configuring Confirmations for Contact Form 7 for WordPress: A premium addon that extends Contact Form 7 by giving you full control over post-submission confirmations. Instead of relying on the default success message, you can display customized messages, redirect users to thank-you pages or external URLs, and apply conditional logic to show different confirmations based on user input. With support for multiple confirmation scenarios, this addon enhances user experience, streamlines workflows, and makes Contact Form 7 more flexible for businesses, agencies, and marketers who need tailored form responses.
Configuring Confirmations for Contact Form 7 for WordPress is a premium addon that enhances the default confirmation options in Contact Form 7, allowing you to fully customize what users see after submitting a form. It supports success messages, redirects, conditional logic, and multiple confirmation scenarios, giving site owners complete control over the post-submission experience.
🌐 Overview
Purpose: Customize confirmation messages and actions after form submissions.
Audience: WordPress site owners, developers, and agencies using Contact Form 7.
Integration: Works seamlessly with Contact Form 7 and requires the base plugin to function.
🔑 Key Features
Custom Success Messages: Display tailored messages to users after form submission.
Redirect Options: Send users to a thank-you page, another page on your site, or even an external domain.
Conditional Logic: Show different confirmation messages or actions based on form inputs or conditions.
Multiple Confirmations: Configure several confirmation scenarios within a single form.
Cross-Browser Support: Works reliably across all modern desktop and mobile browsers.
Seamless Integration: Built to integrate smoothly with Contact Form 7’s existing form structure.
⚙️ How It Works
Install & Activate: Add the Configuring Confirmations addon to your WordPress site.
Set Confirmation Rules: Choose whether to display a message, redirect, or apply conditional logic.
Customize Messages: Create unique success or error messages tailored to your audience.
Apply Conditional Logic: Define rules so different users see different confirmations based on their input.
Publish Form: Once configured, users will experience customized confirmations after submission.
📊 Comparison Table
Feature
Contact Form 7 Default
With Confirmations Addon
Success Message
Basic text only
Fully customizable
Redirect Options
No
Yes (internal/external)
Conditional Logic
No
Yes
Multiple Confirmations
No
Yes
⚠️ Considerations
Requires the Contact Form 7 plugin installed.
Setup Needed: Admins must configure confirmation rules for each form.
Data Privacy: Ensure compliance with GDPR or local regulations when redirecting or storing user data.
✅ Best For
Businesses want branded thank-you pages or redirects.
Agencies customizing client workflows.
Marketers are tracking conversions with redirects to campaign pages.
Developers need conditional confirmation logic for complex forms.
In short, Configuring Confirmations for Contact Form 7 gives you advanced control over post-submission actions, enabling tailored success messages, redirects, and conditional workflows to improve user experience and engagement.
Reviews
There are no reviews yet.
Only logged in customers who have purchased this product may leave a review.
🛠️ How to Install GPL Themes & Plugins from GPLFox.com
Click Upload, then select the .zip file you downloaded from GPLFox.
Press Install Now.
3. Activate the Theme or Plugin
Once installed, click Activate.
For themes: your site will immediately switch to the new design.
For plugins: the plugin will be enabled and ready to configure.
4. Configure Settings
Most premium themes/plugins include customization options.
Navigate to the theme’s Customizer or plugin’s Settings panel.
Adjust layouts, features, and integrations as needed.
5. Keep Files Updated
GPLFox provides updated versions regularly.
Re‑download the latest .zip from GPLFox and repeat the upload process to update your theme/plugin.
✅ Tip for Users: Since GPL products don’t require license activation, you can use them right away after installation. Just make sure to keep them up to date for security and compatibility.
 2 × USD2.99
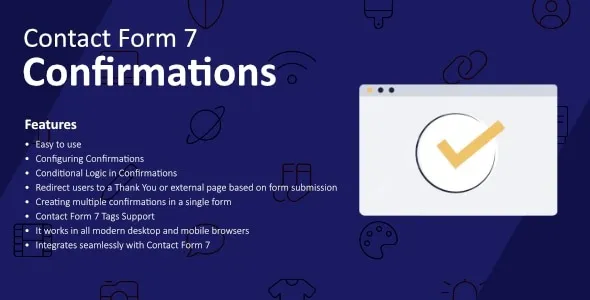


Reviews
There are no reviews yet.