Gravity Forms Enhanced Choices – Jetsloth
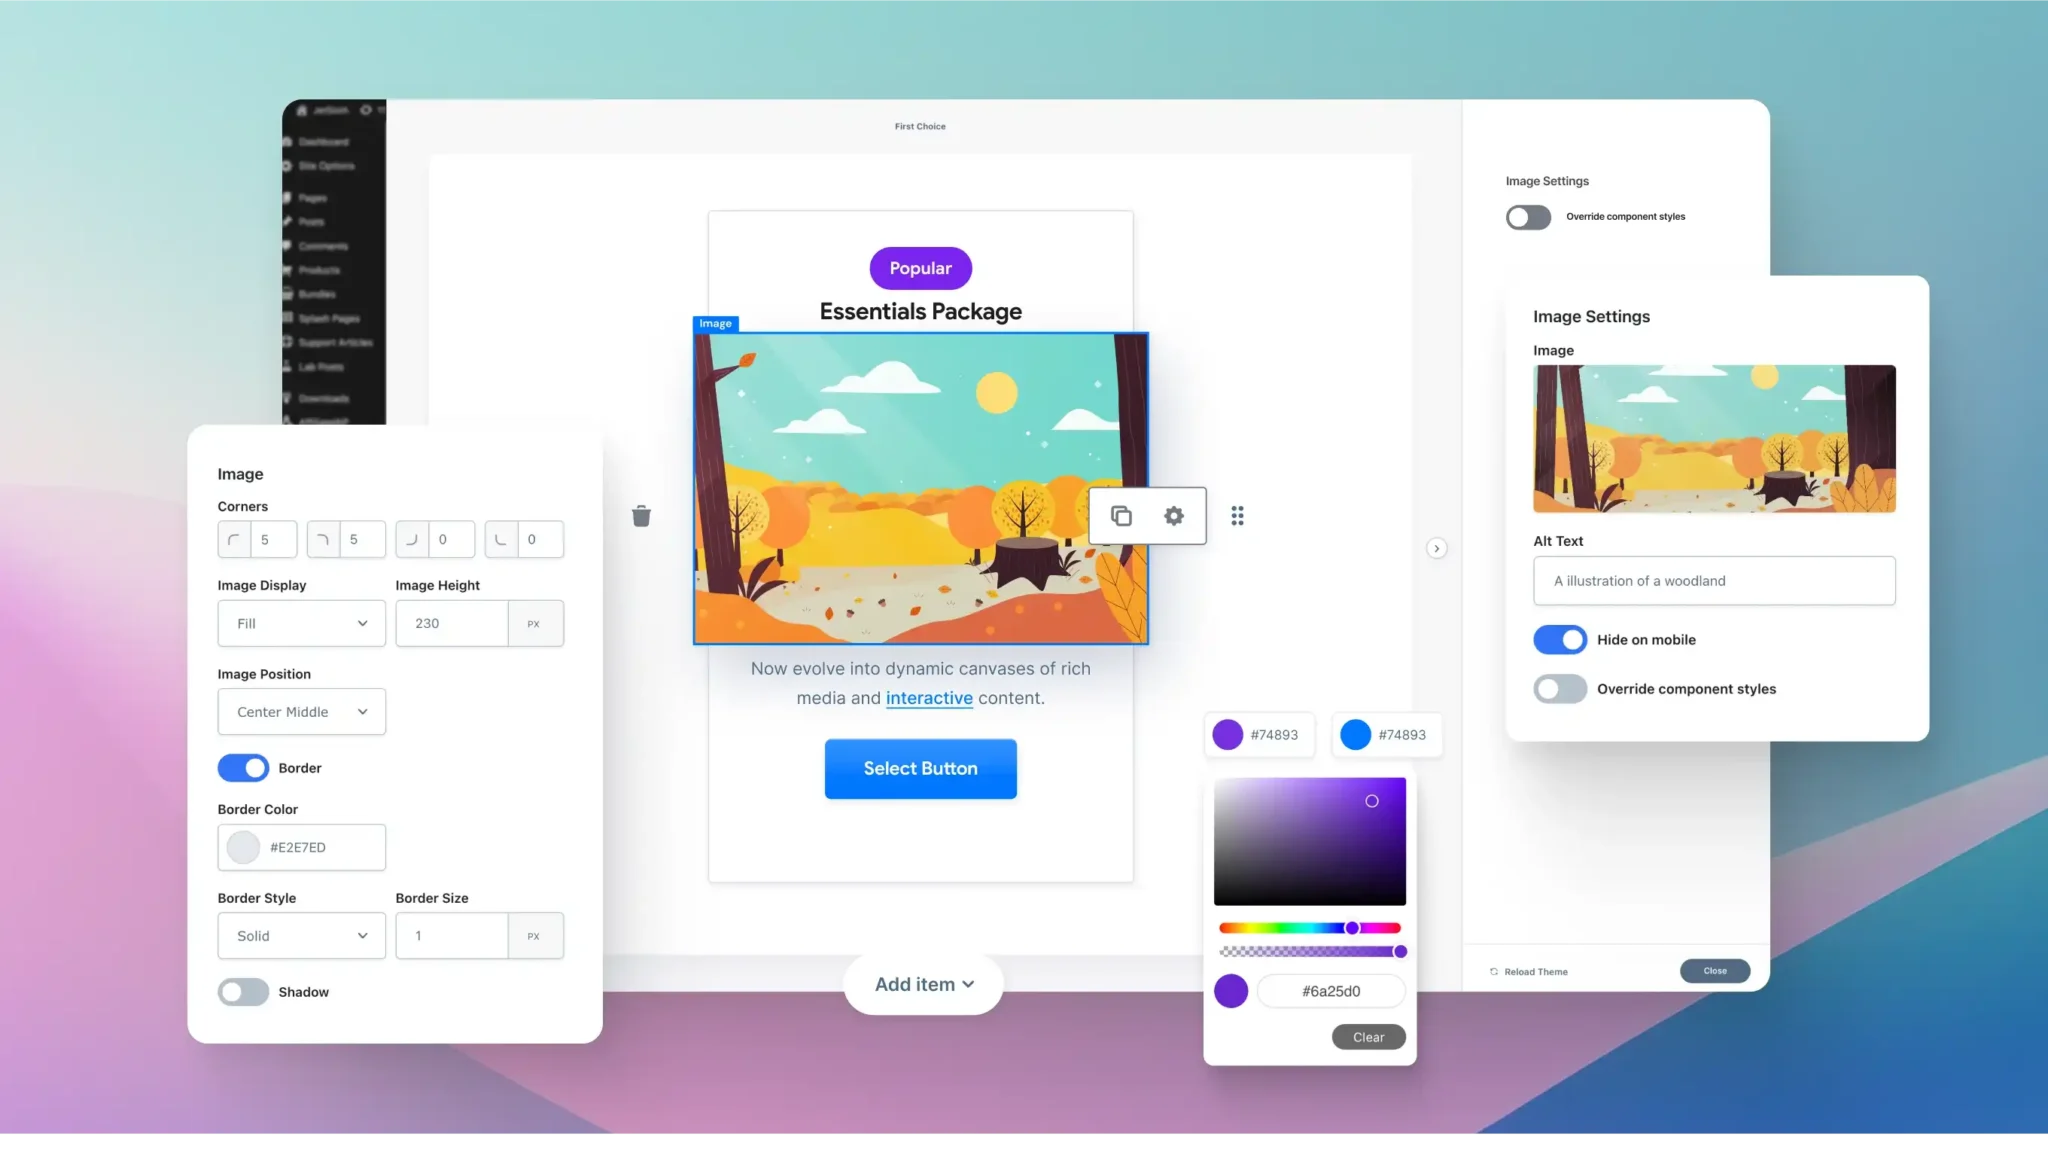
A premium add-on that upgrades standard radio buttons and checkboxes in Gravity Forms into visually rich, customizable choice components. It lets you use images, HTML, buttons, lists, pills, headings, and even pricing blocks for options, creating more engaging and interactive forms. Perfect for product selection, surveys, and branded forms, it improves the user experience and boosts conversions by turning plain-text choices into dynamic, visually appealing options.
Gravity Forms Enhanced Choices – Jetsloth is a premium add-on that transforms standard radio buttons and checkboxes into rich, customizable choice components. It allows you to use images, HTML, buttons, lists, pills, headings, and even pricing options to create visually engaging, interactive forms that boost user engagement and completion rates.Gravity Forms
🌐 Overview
Purpose: Redefine choice fields in Gravity Forms with rich media and advanced styling.
Developer: Jetsloth (certified Gravity Forms developer).
Audience: Designers, marketers, and businesses seeking visually appealing, interactive forms.
🔑 Key Features
Rich Media Choices: Replace plain text options with images, HTML, buttons, lists, pills, headings, and pricing blocks.
Component-Level Control: Customise each option individually, including layout, style, and selected states.
Theme Builder: Create, export, and import custom themes, or use pre-built designs from Jetsloth’s library.
Interactive Selection: Options can be chosen via button clicks or full-card selections for improved usability.
Flexible Styling: Control how choices appear when selected, ensuring consistent branding and a consistent user experience.
Seamless Integration: Works with Gravity Forms core and other Jetsloth add-ons for enhanced design workflows.
⚙️ How It Works
Install Plugin: Activate Enhanced Choices by Jetsloth.
Add Choice Fields: Create radio or checkbox fields in Gravity Forms.
Apply Rich Media: Insert images, HTML, or styled components into each choice.
Customise Themes: Use the theme builder to design or import styles.
Publish Form: Users interact with visually enhanced options instead of plain text.
📊 Comparison Table
Feature
Enhanced Choices (Jetsloth)
Standard Gravity Forms
Choice Display
Rich media (images, HTML, pills, pricing)
Text only
Customization
Full component-level control
Limited
Theme Options
Create/import themes
None
User Engagement
High (visual, interactive)
Lower (basic options)
Best Use Case
Product selection, surveys, branded forms
General forms
⚠️ Considerations & Limitations
Paid Add-On: Requires purchase from Jetsloth.
Not bundled with Gravity Forms license: Sold separately.
Design Effort: Requires setup of images or styled components for best results.
✅ Best For
E-commerce forms (product/package selection with visuals).
Surveys and polls need engaging, interactive options.
Event registrations with a styled package or seating choices.
Agencies and designers creating branded, high-conversion forms.
In short, Jetsloth’s Enhanced Choices add-on elevates Gravity Forms by turning dull text-based options into rich, interactive components—perfect for businesses and creators who want visually engaging, conversion-friendly forms.
Reviews
There are no reviews yet.
Only logged in customers who have purchased this product may leave a review.
🛠️ How to Install GPL Themes & Plugins from GPLFox.com
Click Upload, then select the .zip file you downloaded from GPLFox.
Press Install Now.
3. Activate the Theme or Plugin
Once installed, click Activate.
For themes: your site will immediately switch to the new design.
For plugins: the plugin will be enabled and ready to configure.
4. Configure Settings
Most premium themes/plugins include customization options.
Navigate to the theme’s Customizer or plugin’s Settings panel.
Adjust layouts, features, and integrations as needed.
5. Keep Files Updated
GPLFox provides updated versions regularly.
Re‑download the latest .zip from GPLFox and repeat the upload process to update your theme/plugin.
✅ Tip for Users: Since GPL products don’t require license activation, you can use them right away after installation. Just make sure to keep them up to date for security and compatibility.


Reviews
There are no reviews yet.